
Figuring out how to screen capture on a Chromebook appropriately is extraordinary expertise. That will help you in both work and school. Screen capture is an essential capability incorporated into almost any framework or operating system. And a customary PC console even has its power: the print screen key. In any case, taking a screen capture on a Chromebook isn’t as natural.
Fortunately, Google has previously included screengrab highlights, like screenshotting on a Macintosh. So to utilize the best Chromebook to its fullest potential, it’s essential to get familiar with the choices accessible for screengrabbing: full-screen captures, trimmed snatches, window catch, and what to do if you don’t approach the console by any means.
There’s even a possibility for catching them onto the clipboard and how the Chromebook screen captures are put away. We can assist you with utilizing the best PC to their maximum capacity, whether the smartest understudy PC or the best flimsy and light PC, so continue to peruse to figure out how.
Supported Connections
Track down unnerving great HD 4K film
Shutterstock
What is a Chromebook?
Here are our top picks for understudy Chromebooks
This is the way to screen capture on a Windows 10 PC
Instructions to screen capture on a Chromebook
The most effective method to screen capture on a Chromebook with the entire screen

The most widely recognized method for taking a screen capture with a Chromebook is to get the entire screen, and your Chromebook can do this effectively enough by squeezing the Ctrl + show windows key (this is the capability key with the square shape and two following lines, situated between the full-screen and lessen brilliance keys. On the off chance, it was a conventional capability key; it would be F5).
Suggested Recordings FOR YOU…
CLOSE
Whenever you’ve squeezed these keys, ChromeOS (the working framework Chromebooks run on) springs up a warning showing the get that has been taken.
This will remain apparent for something like 10 seconds before it clears itself. The programmed filename contains the date and time.
Instructions to screen capture on a Chromebook
Instructions to catch part of the screen
Chromebooks offer two more underlying screen capture modes: trimmed to a region and the ongoing window; however, this last one is undoubtedly not a reported element, so we need to know how comprehensive help is.
To get an edited region, press Ctrl + Shift + show window keys. The mouse cursor will change to a crosshair; this empowers you to draw a square shape around the area you might want to catch.
You can effectively catch select windows by squeezing the Ctrl + Alt+ show window keys. For example, the following window you click on will be seen in a screen capture.
The most effective method to screen capture on a Chromebook
Alternate approaches to screen capture on a Chromebook
Have a Chromebook that doesn’t have those capability keys? Try to avoid concern. You can, in any case, catch the screen gets on ChromeOS tablets. This is finished along these lines to Android. Press the power button and volume down keys simultaneously.
If you don’t have this admittance to a console or even the power button, you can snatch through the Chrome program menu by choosing Menu > More devices > Take screen capture.
There must be more choices to trim or catch a window straightforwardly utilizing this menu capability.
The most effective method to screen capture on a Chromebook
Instructions to screen capture on a Chromebook utilizing the clipboard
Assuming you’re utilized to how Windows 10 handles screenshots – that is to say, when you press the Print Screen key, it’s duplicated straightforwardly to the clipboard as opposed to it being saved naturally – you can copy this way of behaving with your Chromebook… to a degree.
At the point when you take a screen capture on a Chromebook, investigate the notice that springs up showing the screengrab. A ‘Duplicate to clipboard’ button is at the lower part.
Click this, and the snatch is currently accessible to glue into any archives you’re chipping away at or for controlling in any picture manager you’re utilizing.
Instructions to screen capture on a Chromebook
Where to find your Chromebook screen captures
Consider the possibility that you’ve gone on a screen. Get furor and pile up heaps of Chromebook screen captures in succession. And presently need to return and scrutinize them to uncover every one of the terrible ones and select them. It would help if you kept it. The short response is that Chromebook screengrabs are stored in the Downloads organizer as PNG documents.
If you need help finding those, tap the ‘Search’ button, type ‘documents,’ open the Records application, and snap ‘Downloads’ in the left-hand alternate route list.
Step 1
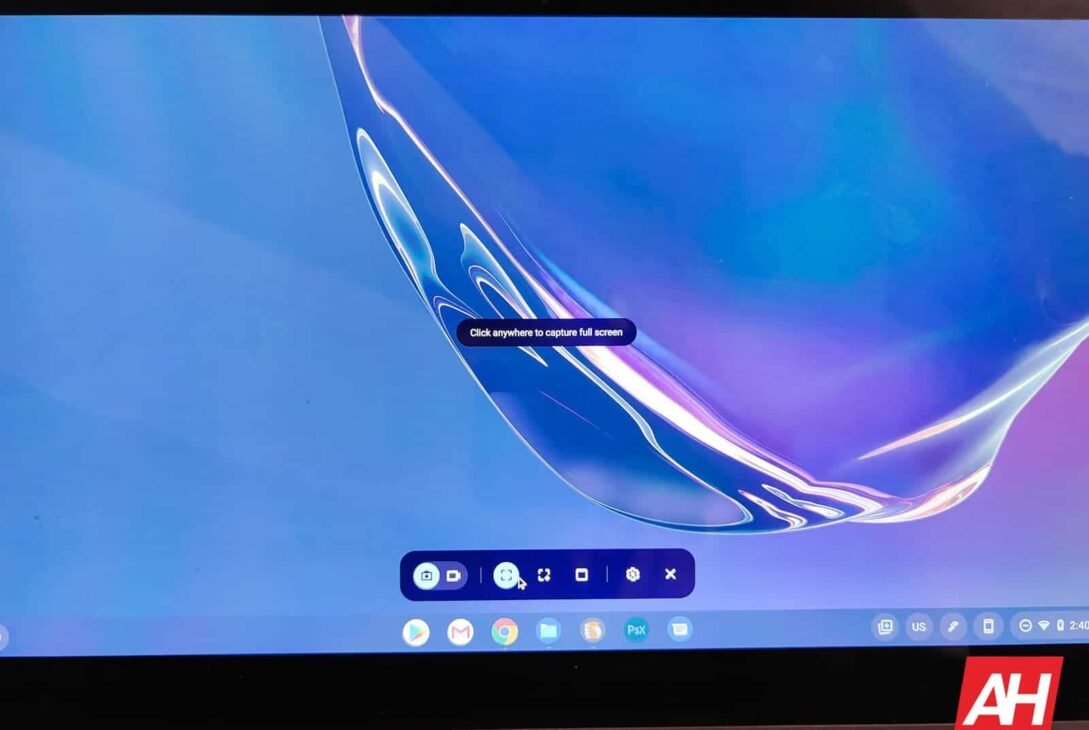
Click “Screen Capture” in Quick Settings.
Verify that the material you wish to capture is visible on your screen.
Step 2
Choose whether you want to capture your entire screen, a single window, or a small area of it with the Screen Capture tool.
You have the option of recording your screen in part or in whole.
Step 3:
Click “Capture” on the screen after making your choice.
Step 4
When finished, the video or screenshot will appear in Tote on your shelf and be instantly copied to your Clipboard.


